How to run Radicale in a Synology Docker Container?
What is radicale?
Radicale is a very lightweight but powerful CalDAV (calendars, to-do lists) and CardDAV (contacts) server you can host yourself.
Your prerequisites
- A Synology NAS of the Plus Series, as those are enabled for virtualizing environments with their more powerful central processing units (CPUs). These are easily identified by the name DSxxxx+.
- Some understanding of DNS, Network, Ports and Proxies to make sense of and secure things.
- Understanding of IP handling and Port forwarding for your Router.
- Understanding of the Synology Disk Station (DS) and the Disk Station Manager (DSM) and an Administrator Account for the DSM.
- A registered Domain which forwards (e.g. via DynDNS) to your Router/Server (Synology DS) and/or a Subdomain with according CNAME entry.
- On your Synology Docker is installed and running.
Setting up the development area
To start, one needs a development area on the Synology. It is used to keep all needed files together that are needed to ramp up a Docker Image and in further steps the container and its necessary configuration files. This step is needed, regardless if you want to build your own image or if you simply publish the container.
Use Synology’s desktop: Control Panel-> Shared Folder-> Create
For later examples I called mine „dock_dev„.
In dock_dev you create a folder called radicale.
Download this file
and untar the file into /volume1/dock_dev/radicale
Make sure you are able to SSH into your Synology. I will not explain how to do that. If you need help, ask Google.
The next step depends on what you want to achieve. If you simply want to use the given DockerHub Image an deploy your container <follow this link>.
Building the Docker image
This section covers how to develop your own radicale image an push it to DockerHub. If you aren’t going to develop an own container >jump this section<!
- SSH into Synology
- sudo -i
- cd to your development area based in your Synology. Based on previos steps, you should find a file named „Dockerfile„.
In this example:
cd /volume1/dock_dev/radicale - To build the image run command:
docker build -t 4tegs/radicale .
You should name your container based on your DockerHub ID ( 4tegs) and project name (radicale). If you don’t do so, you need to „re“tag you image later for the DockerHub push. - Have a look at Synology -> Docker, you should find the image there.
Push image to DockerHub
- Command: docker login (provide your accounts credentials)
- docker push 4tegs/radicale:latest
Deploy the Synology Docker Container
To deploy a Radical WebDav/CalDav Service throug a Docker container on Synology follow the next steps. The listed prereqisites must be fullfilled.
The Data Area Folder
As Docker was installed, Synology has set up a shared folder /volume1/docker. This folder can be used to host your containers configuration files and production data.
Let’s set up the radicale folder space for our container.
- SSH into Synology
- sudo -i
- command: mkdir /volume1/docker/radicale
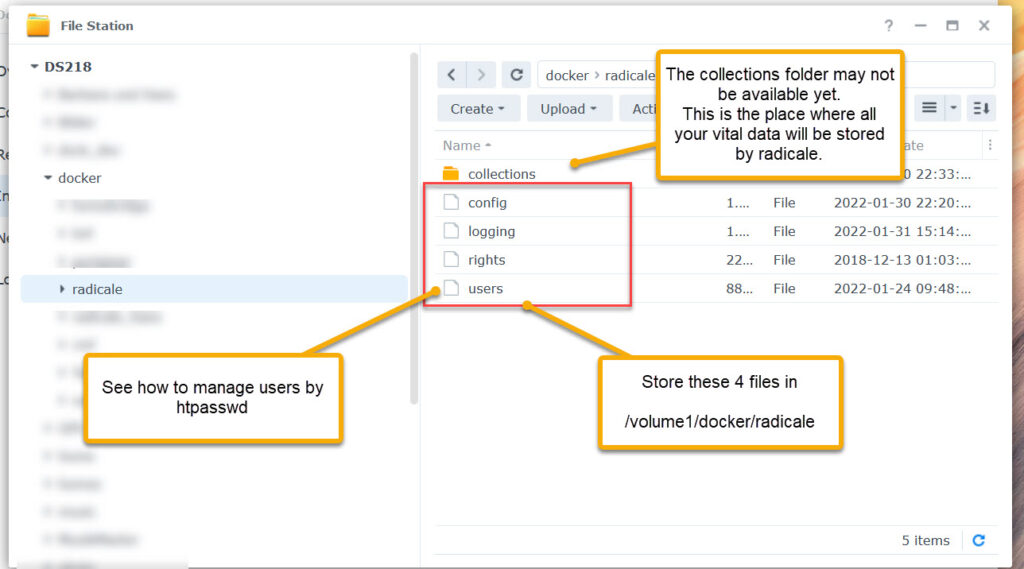
Install configuration files
Download this file (if haven’t done yet):
Untar only the 4 following files into /volume1/docker/radicale. These files are the configuration files needed to run Radicale:
Provide a User and Password to use Radicale
Radicale needs to be clear on access rights. The config file is set up in a way, that access is provided a htpasswd type of user / password management and cyphered with an MD5 algorithm (very strong). If you want to change that, consult the radicale help sites.
To add your user and password:
- cd /volume1/docker/radicale
- htpasswd -cmb users your-user1 password1
if you want to add another user:
htpasswd -mb users your-user2 password2
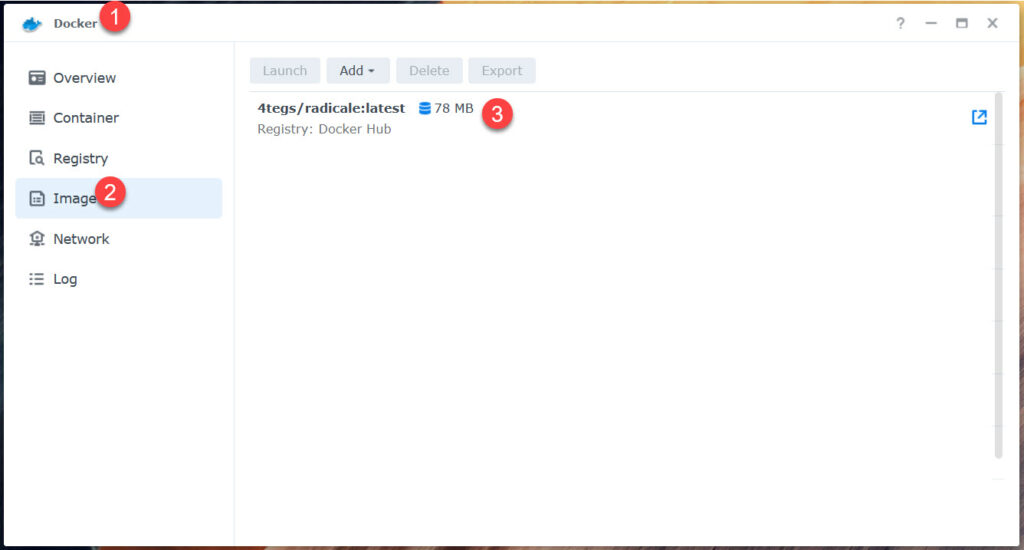
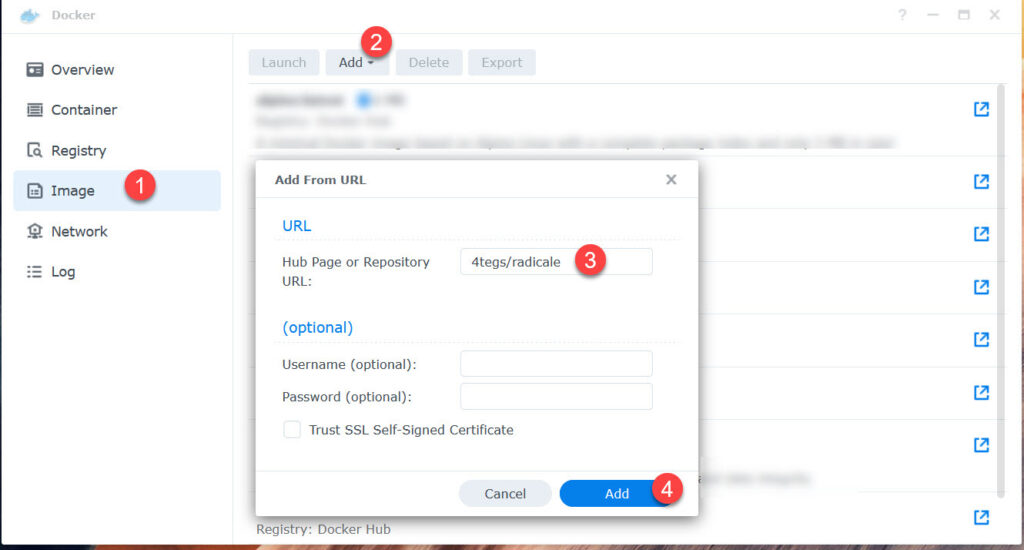
Pulling the image from Docker Hub
Deploy container Version 1:Using Synology setting
This is the first and very simple method.
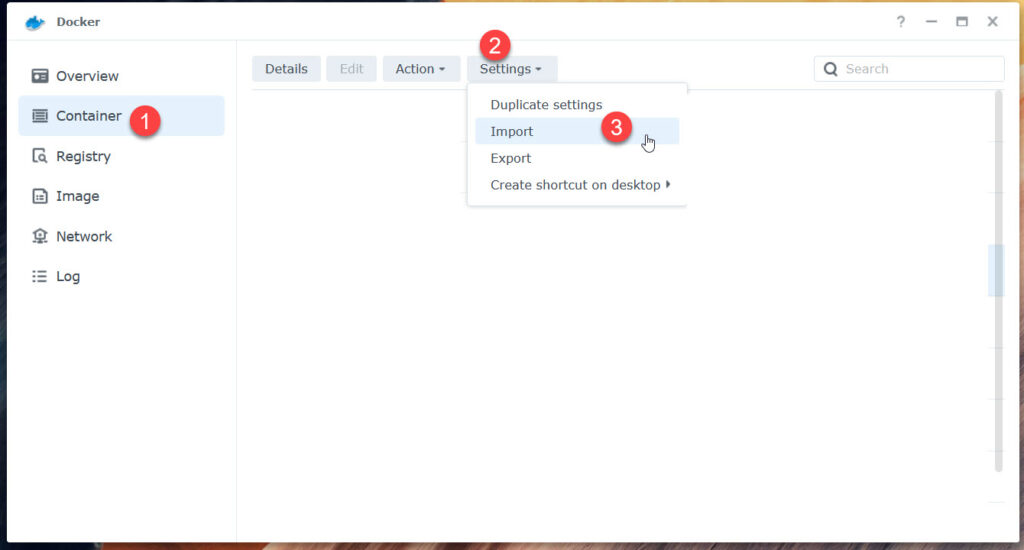
Import the radicale.json. The container should be deployed afterwards.
Deploy container Version 2: Using the docker-compose.yml file
- Again SSH into your Synology
- Best practice is, to untar the radical.tar into the development area: /volume1/dock_dev/radicale
- cd /volume1/dock_dev/radicale
- docker-compose up –no-start
The container is now available, just start it!
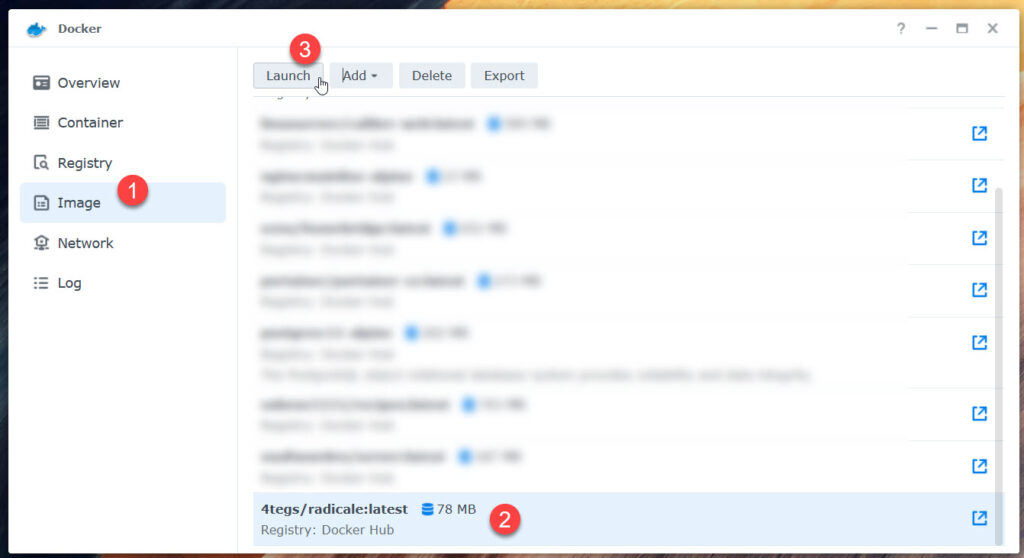
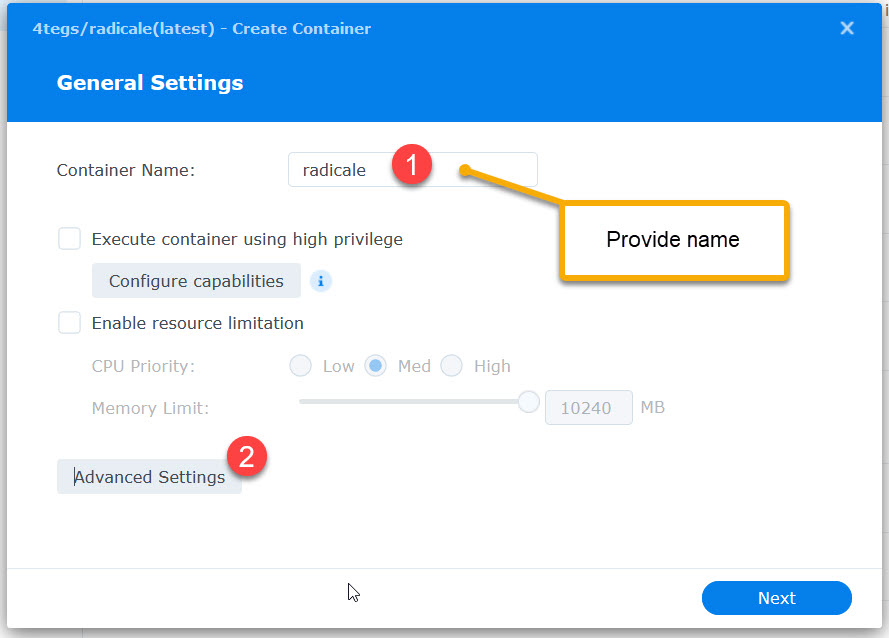
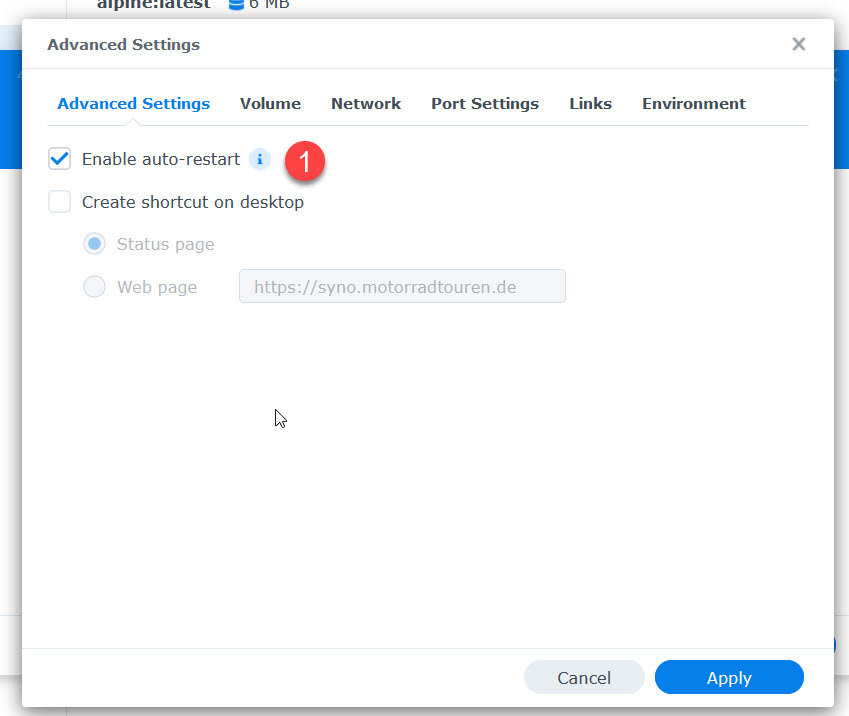
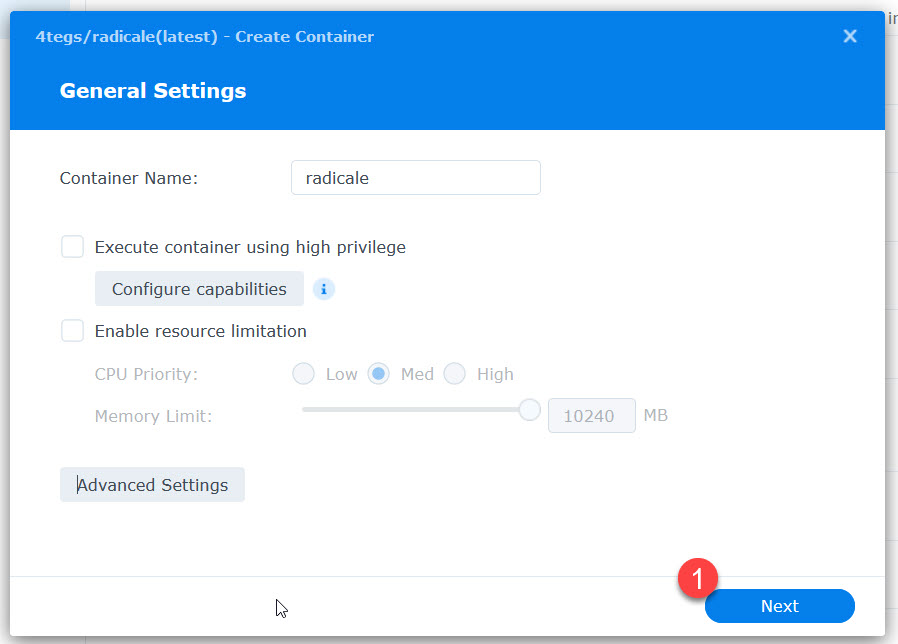
Deploy container Version 3: Using the Docker Menu
In your Docker Menu follow these steps:
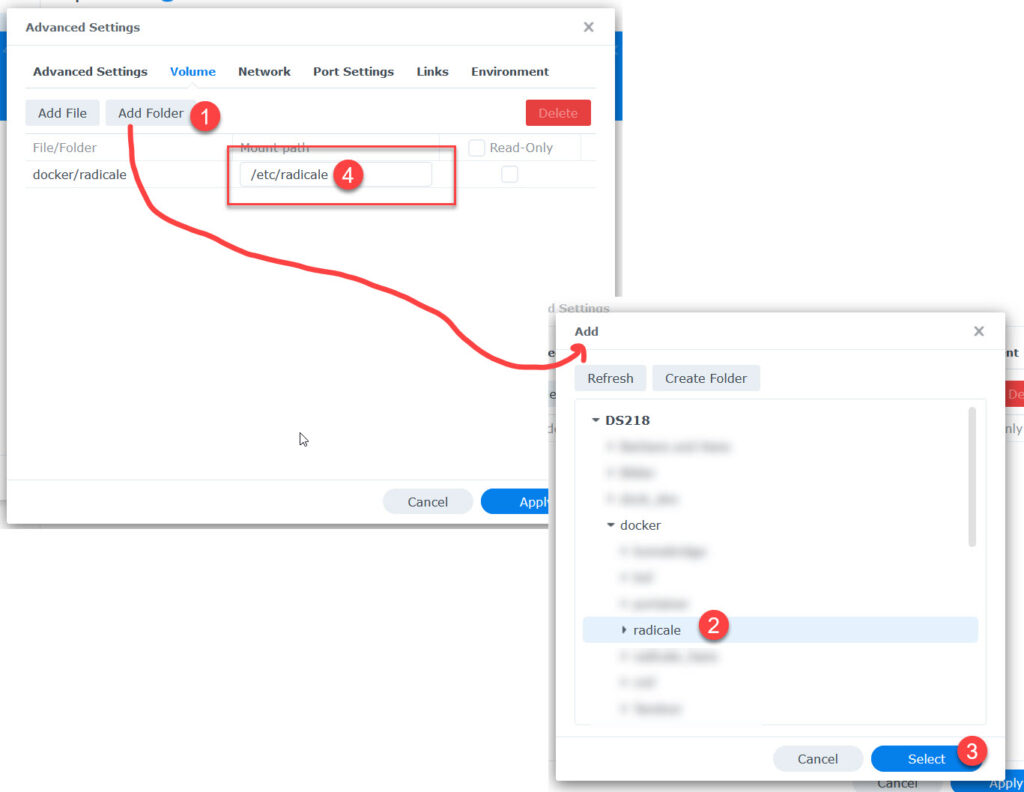
to
/etc/radicale
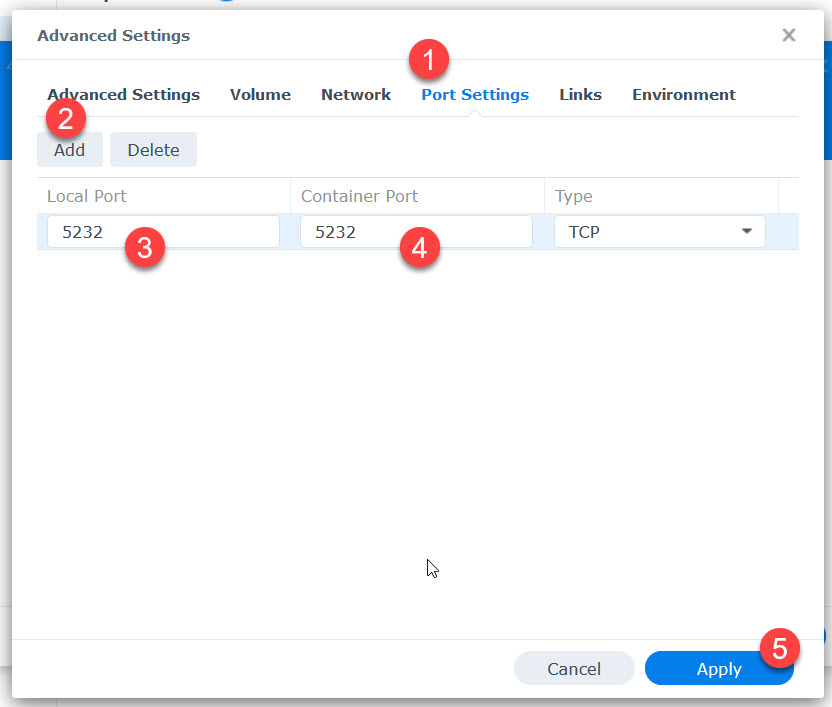

Done!
How to access radicale?
Localhost
The very basic way is by your Synology’s IP followed by port 5232 (if you haven’t changed earlier. In my example:
http://192.168.158.170:5232
Reverse Proxy
The localhost method provides the acces only within your local network. The much better way is to set up a reverse proxy pointing to the above address.
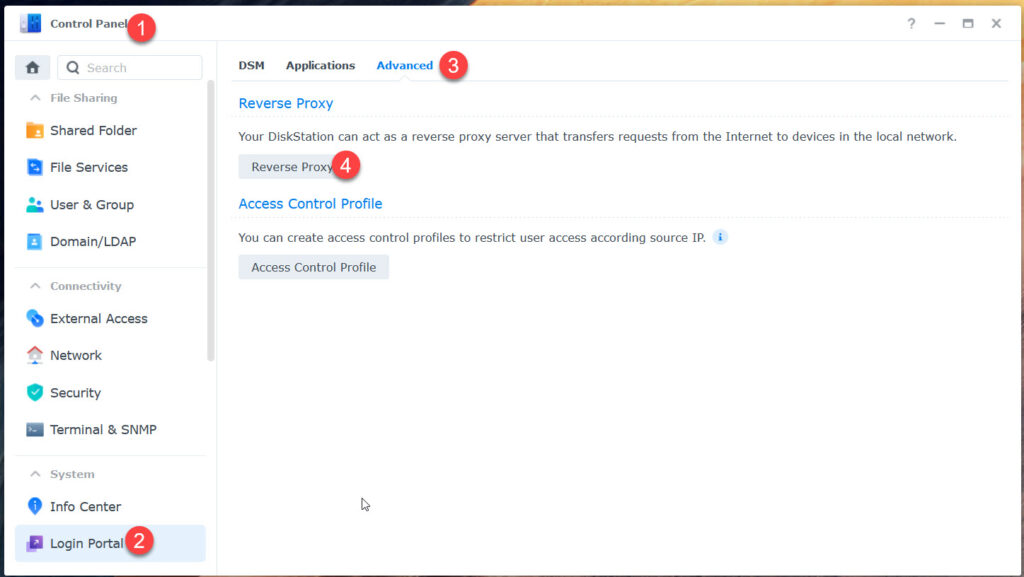
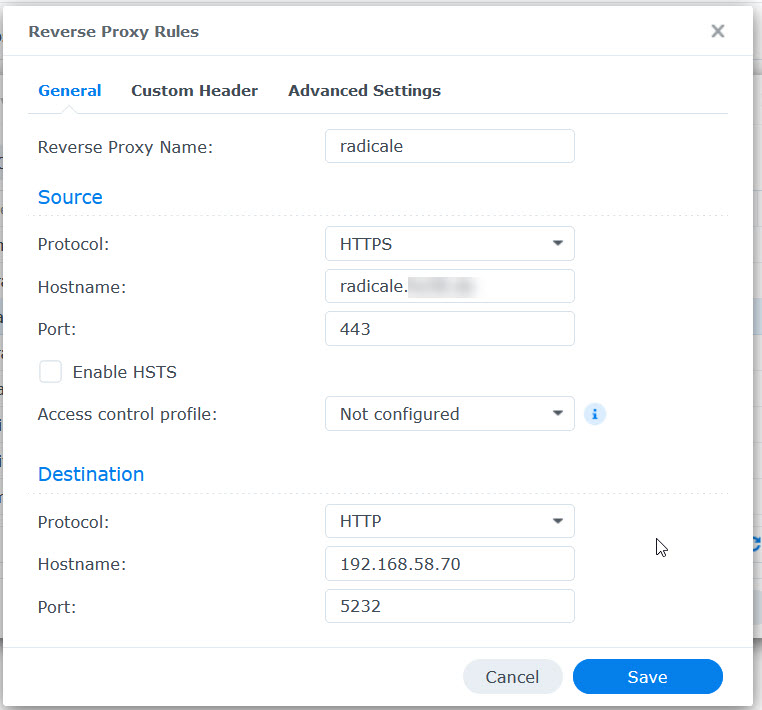
Sure you need a DYNDNS being setup…..