Overview
This instruction will inform about a couple of basic components and guide through the process of installing Traccar on a Synology NAS using Docker. It will focus on employing Sonology’s User Interface (UX) capabilities mainly.
You are here because you want to install Traccar on a Synology Plus Series in a way that Tracar ports do not overlay any ports used by Synology.
Your prerequisites
- A Synology NAS of the Plus Series as those are enabled for virtualizing environments with their more powerful central processing units (CPUs). These are easily identified by the name DSxxxx+.
- Some understanding of DNS, Network, Ports and Proxies to make sense of and secure things.
- Knowledge of how to SSH into your Synology and perform basic tasks in Linux.
- Understanding of IP handling and Port forwarding for your Router.
- Understanding of the Synology Disk Station (DS) and the Disk Station Manager (DSM) and an Administrator Account for the DSM.
- A registered Domain which forwards (e.g. via DynDNS) to your Router/Server (Synology DS) and/or a Subdomain with according CNAME entry.
- Very supportive is having Portainer installed on Synology Docker. This is part of this instruction but is not an operating requirement.
What is Traccar?
With Traccar you can view your GPS tracking devices in real-time with no delay. There are various mapping options, including road maps and satellite imagery. The Server can handle a wide variety of sensors and additional information supplied by GPS units. Code and documentation can be found here: https://www.traccar.org/
More details here: https://www.traccar.org/products/
The system we install in this instruction currently of 3 containers, one for the database, one for database management and one for traccar itself.
What is Docker?
Docker is a platform written in Go and takes advantage of several features of the Linux kernel to deliver its functionality.
Docker provides the ability to package and run an application in a loosely isolated environment called a container. The isolation and security allow you to run many containers simultaneously on a given host (Synology).
Docker uses a technology called namespaces to provide the isolated workspace (the container). These namespaces provide a layer of isolation. Each aspect of a container runs in a separate namespace and its access is limited to that namespace.
Note: Synology’s DSM is a heavily customized Linux. Even though DSM already employs for example components like ngnix and postgres, separate containers will use a part of the existing Linux base but not interfere with any of the Synology’s components of functionality.
Deploy Traccar
- Create the folder structure
- Create a Docker network
- Pull images
- Create container
Create folder structure
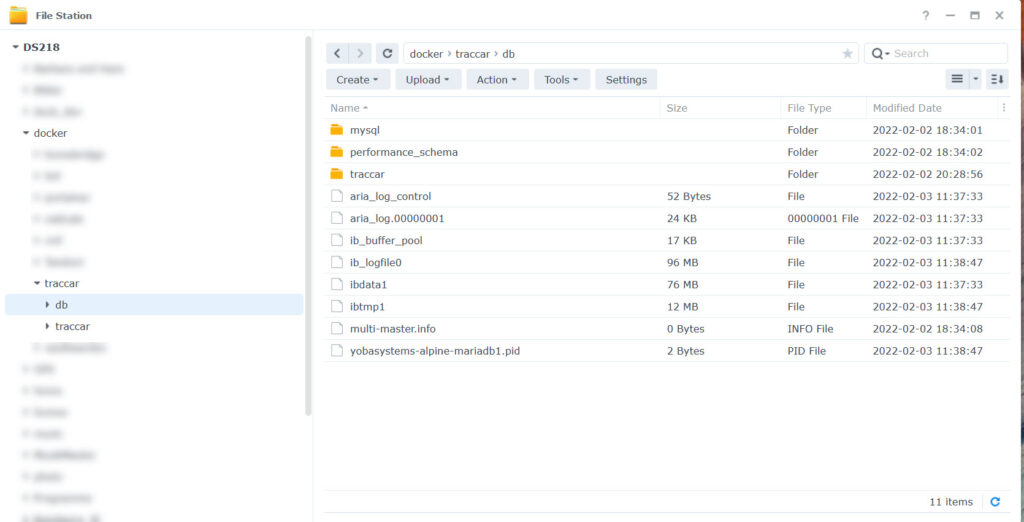
In Synology folder /volume1/docker make your workspace for the container data and configuration files.
- /volume1/docker/traccar
- /volume1/docker/traccar/db
- /volume1/docker/traccar/traccar
- /volume1/docker/traccar/traccar/conf
- /volume1/docker/traccar/traccar/logs
Create / edit configuration file
20. August 2022:
With traccar version >5, before you move on, read this post carefully:
https://www.traccar.org/forums/topic/web-gui-404-not-found-from-one-day-to-another/page/3/
What it basically says is, don’t link the „conf“ folder, but link traccar.xml only instead! The following instruction should work, but I haven’t tested it. As I’m travelling these days, I can’t fully update this instruction!
There are two configuration files. Upload them via Synology FileStation todocker/traccar/traccar/conf
- default.xml : Use the file provided with the installer package from Traccar.org or download it from Github: https://github.com/traccar/traccar/blob/master/setup/default.xml. This file should not be edited by you unless you know what you do!
- traccar.xml : Here is my example, you need to edit it according to your needs!
Best is to start with this section, leave the rest for later tuning:
1 2 3 4 5 6 7 | <!-- Using a MYSQL Database in Docker --> <entry key='database.driver'>com.mysql.cj.jdbc.Driver</entry> <!-- Your MUST change the IP to your Synology's physical IP --> <entry key='database.url'>jdbc:mysql://your_ip:33306/traccar?serverTimezone=UTC&useSSL=false&allowMultiQueries=true&autoReconnect=true&useUnicode=yes&characterEncoding=UTF-8&sessionVariables=sql_mode=''</entry> <entry key='database.user'>traccar</entry> <!-- change User and Password to fit your installation --> <entry key='database.password'>yourpassword</entry> |
change
- your_ip to your Synology’s IP e.g. 192.168.178.60
- yourpassword to the password you later will provide when MariaDB is being set up
Morde details: https://www.traccar.org/configuration-file/
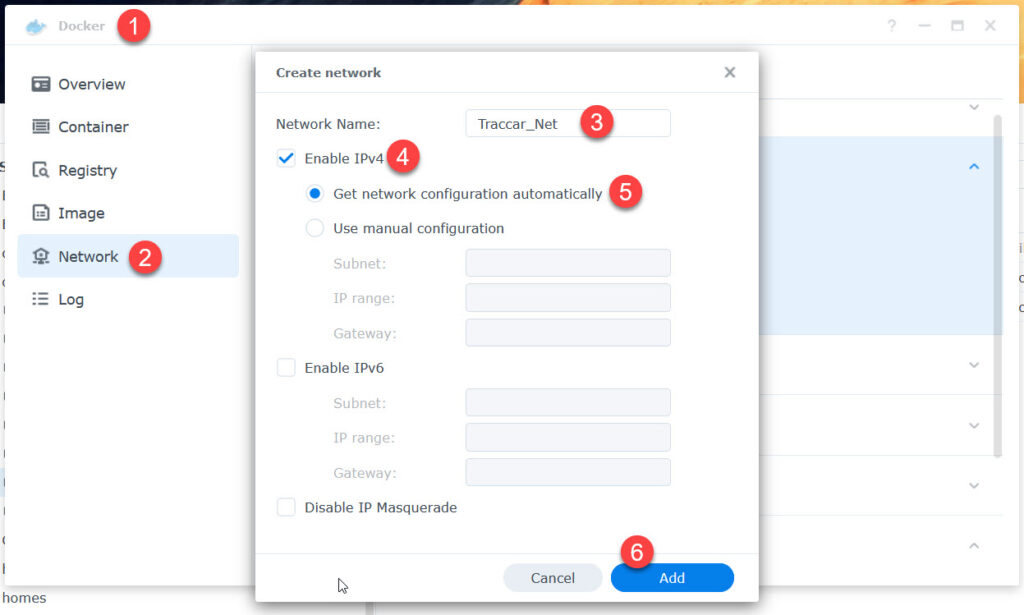
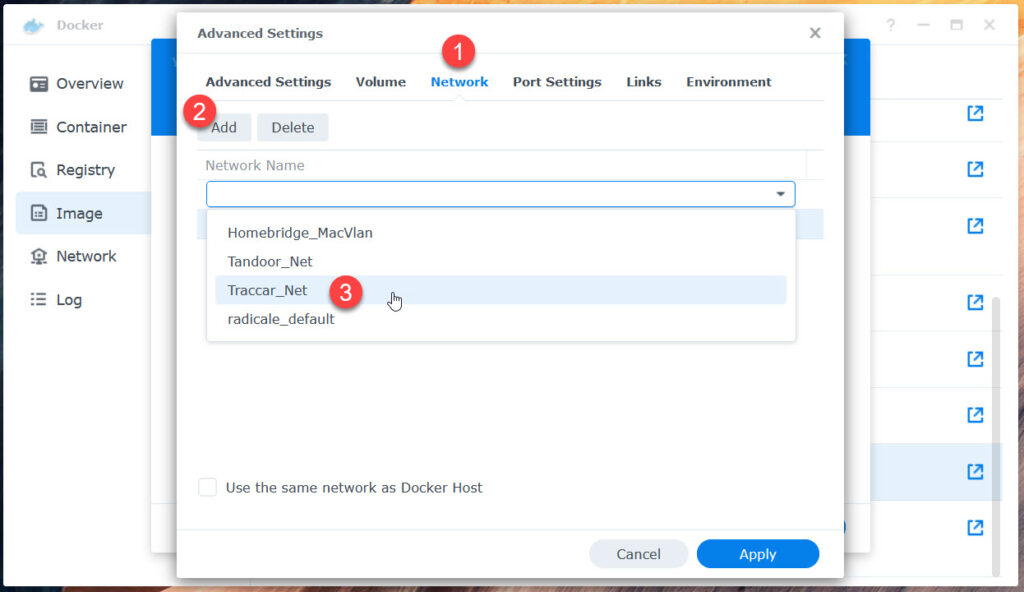
Create a network
To separate and link our container we do need a special network.
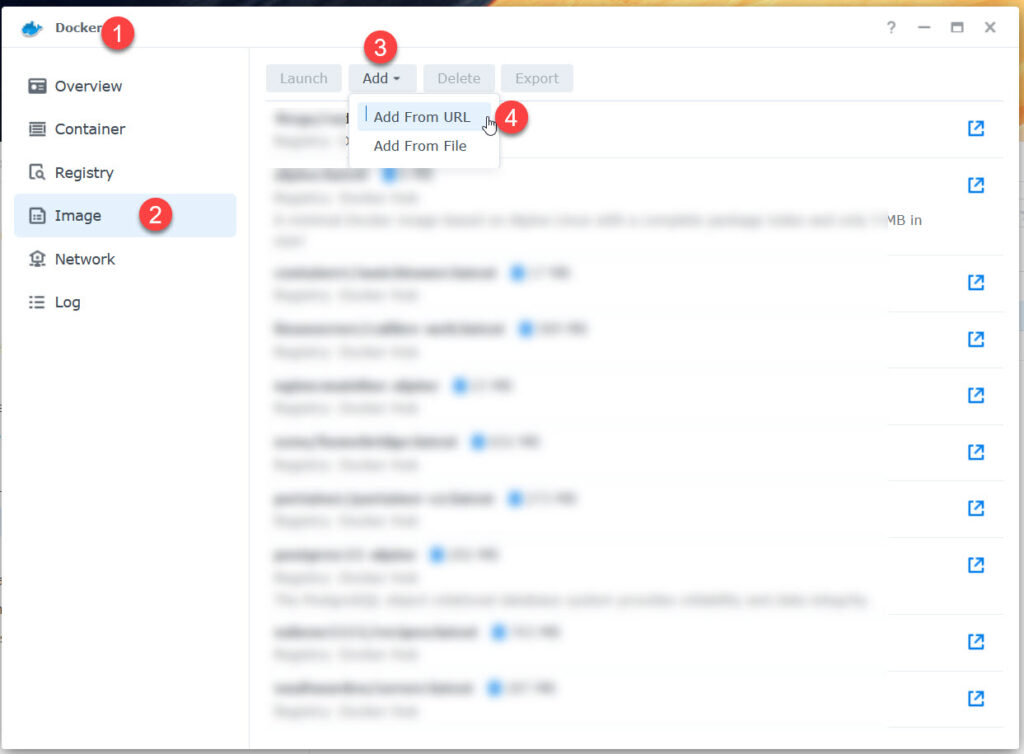
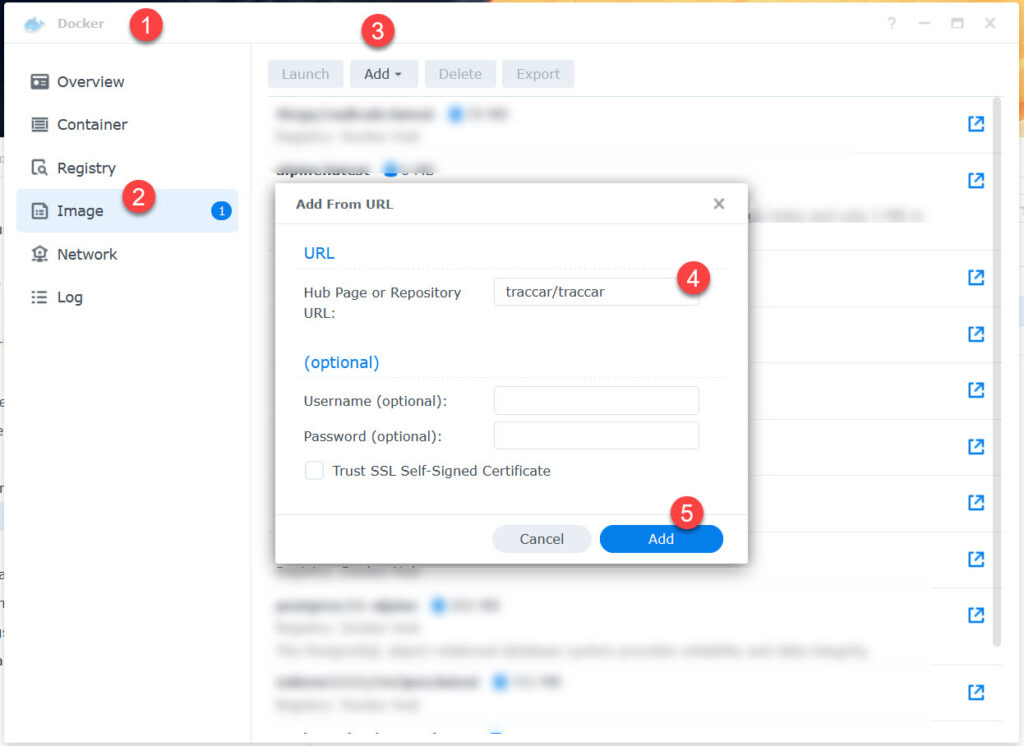
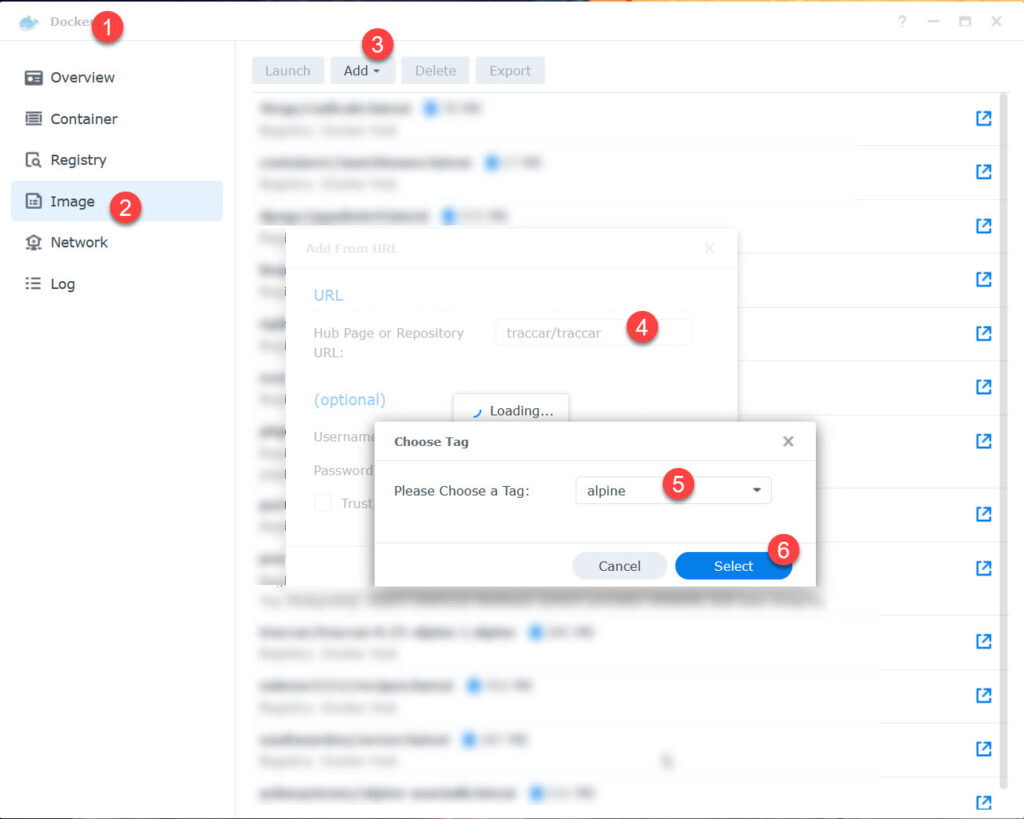
Pull images
If you are familiar with how to pull an image, simply pull these and skip to create container.
- yobasystems/alpine-mariadb:latest
- phpmyadmin:latest
- traccar/traccar:alpine
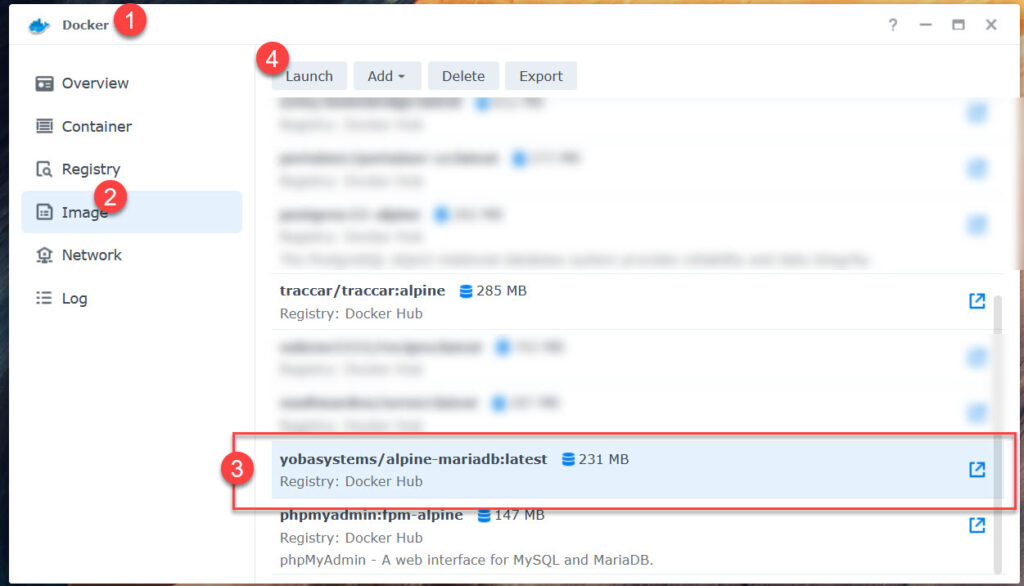
MariaDB
Let’s get the MariaDB first and use it as an example for the other two images.
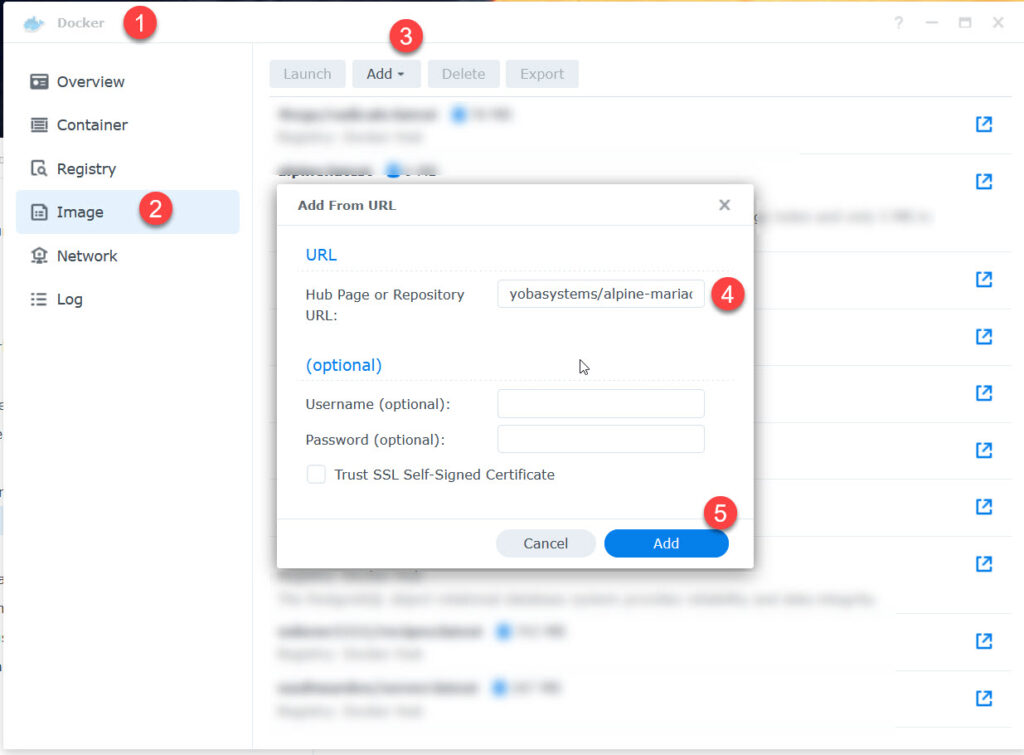

as soon as you click „add“, you should see the file being downloaded in Docker -> Image.
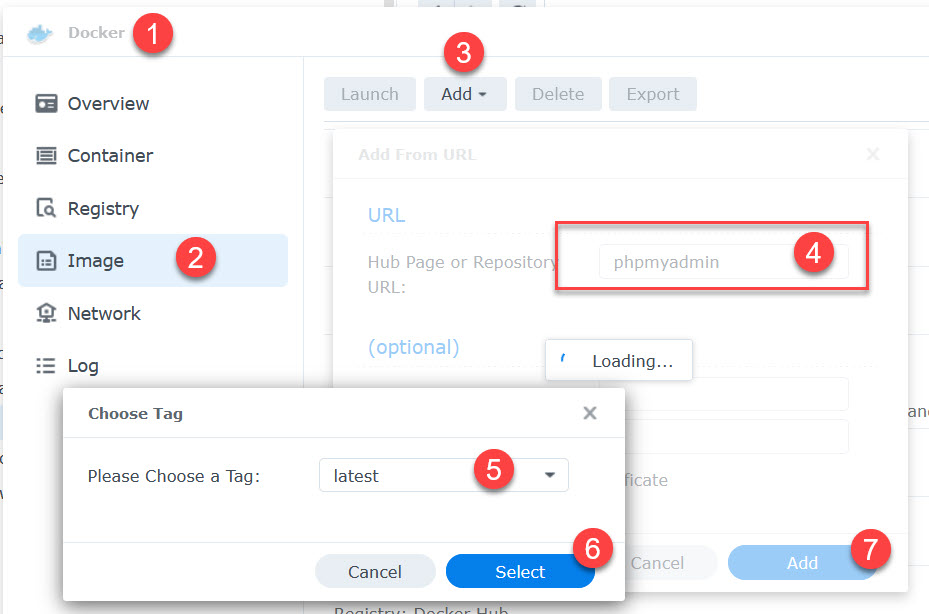
phpMyadmin
Traccar
Create Container
Make sure you have created the folder as described.
Create MariaDB
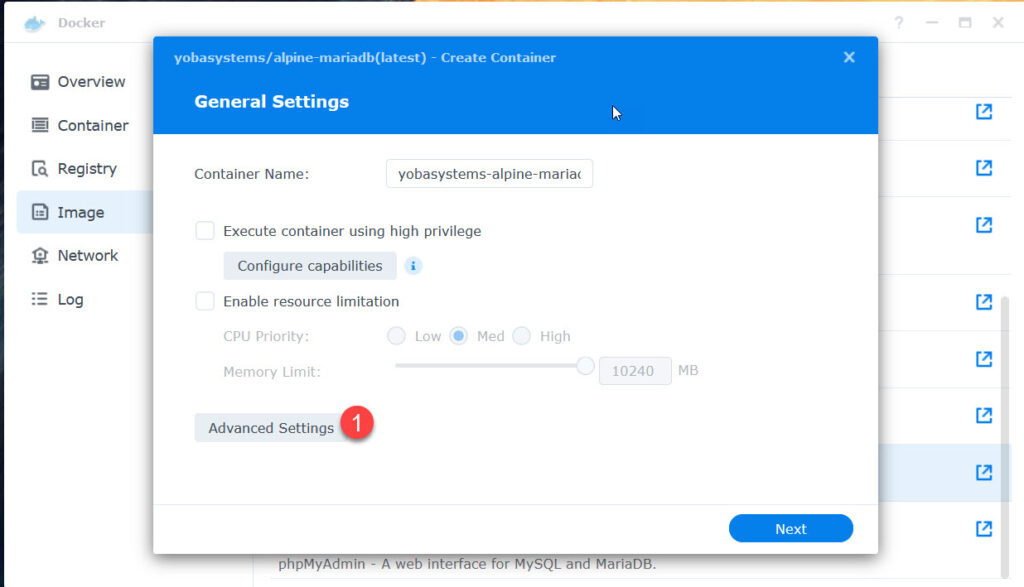
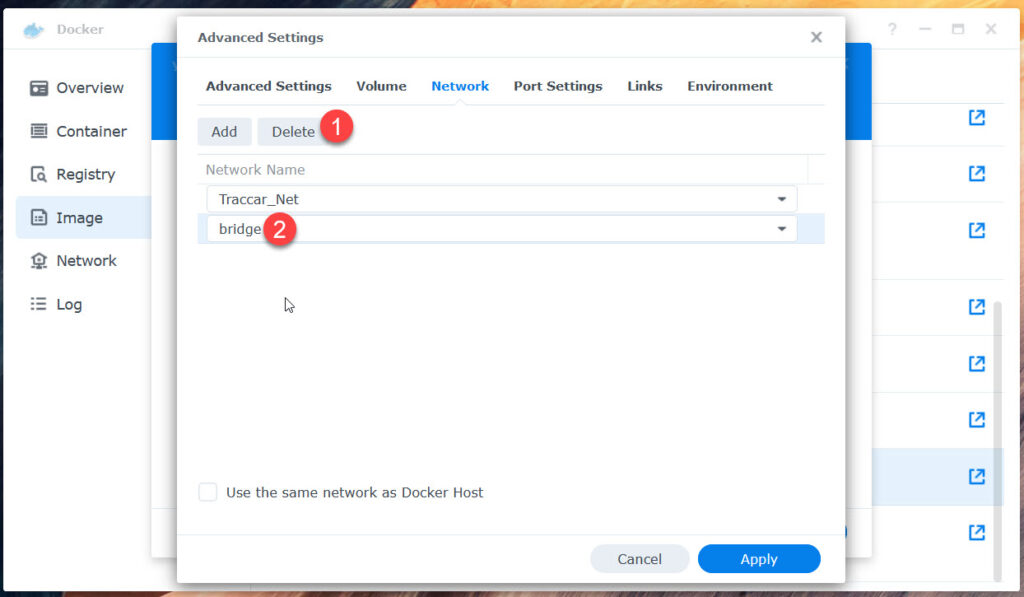
Select „Advanced Settings“
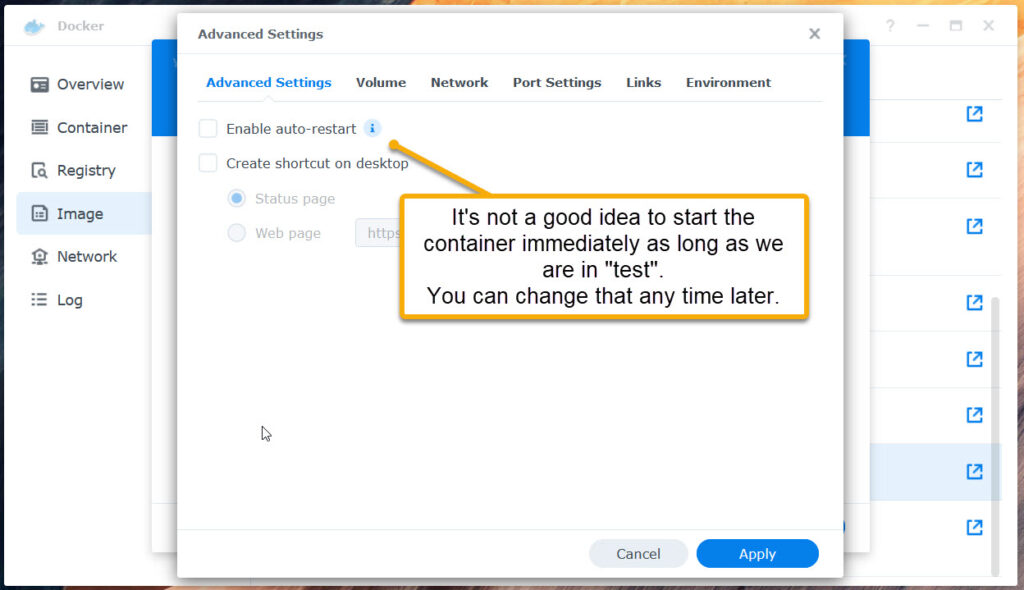
Goto Network next.
Skip „Links“
Note them, you need them again later!
Press Apply, then Next
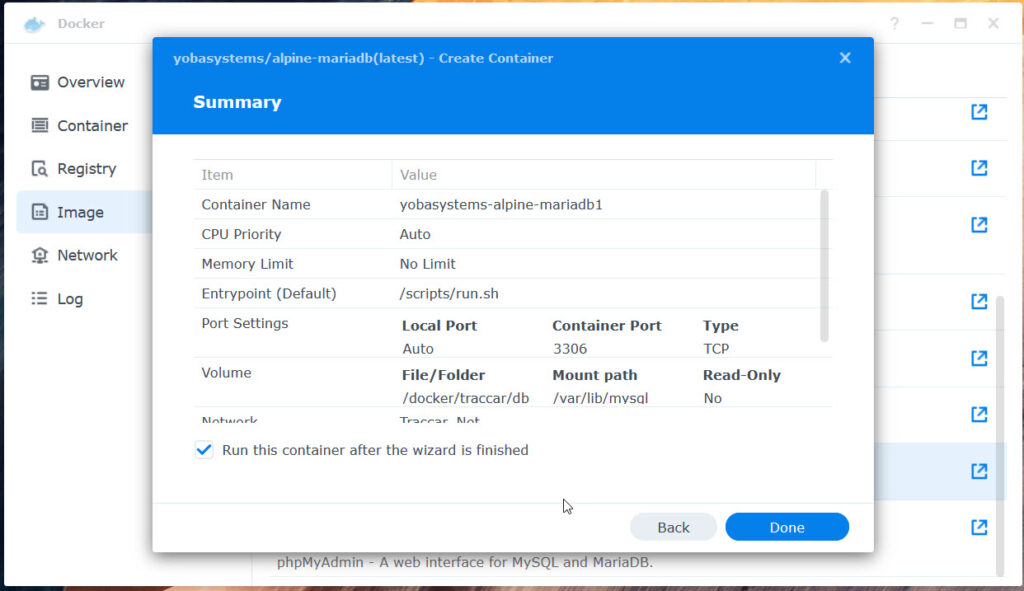
Press done to create the container.
phpMyadmin
I’m not documenting all steps. What you need:
- Launch phpmyadmin:latest
- Click Advanced Settings
- Advanced Settings tab: Skip
- Volume tab: Skip
- Network tab: Attach to „Traccar _Net“, delete „bridge“
- Port Settings tab: To start phpMayadmin wee need a port. Define yours, leave the container port untouched (I’m using 8283/80).
- Links tab: Skip
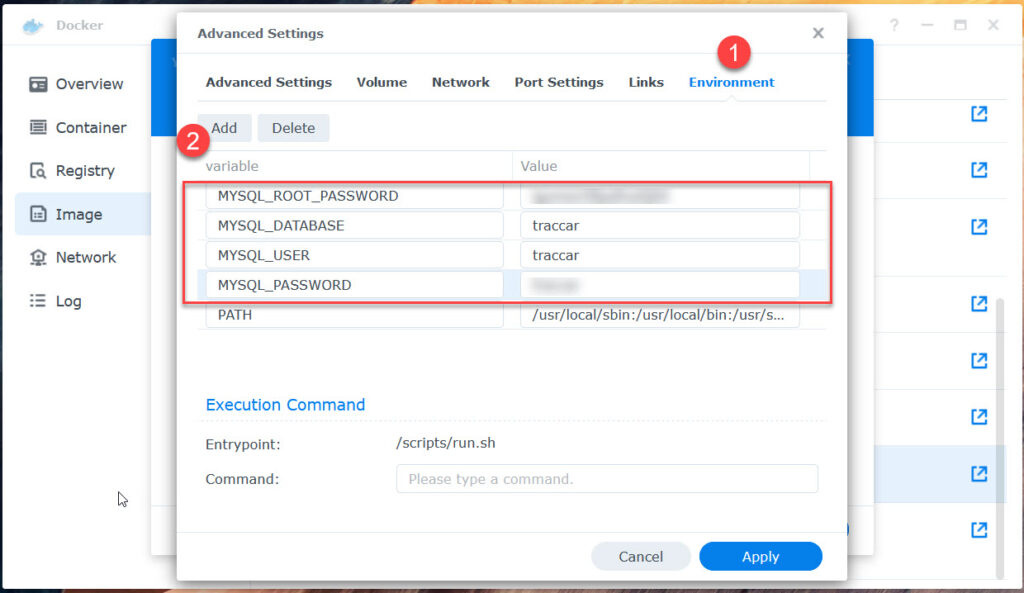
- Environment tab:
- Change UPLOAD_LIMIT to 8G . Why? Over time your database will grow. The default value is by far to small for any Database restore activities.
- PMA_PASSWORD – your traccar database password set when having set up mariadb.
- PMA_USER – traccar
- PMA_PORT – 3306 (YES 3306 NOT 33306)
- PMA_HOST – mariadb .
The name of the mariadb container. If yours has another name – use that.
As soon as the container is running, you can log in using your webbrowser: http://localhost:Container_Port where localhost is your Synology’s internal IP and Container_Port is the Port address you provided earlier.
In my case: http://192.168.58.70:8283
Traccar
Again, I’m not describing picture by picture. Simply follow the logic provided for MariaDB.
Now: You need to have a basic understanding of the ports you plan to use. Before you proceed, know what port / protocol your tracker uses: https://www.traccar.org/devices/
If using the App on your mobile as a tracker: It is using the OsmAnd protocol on Port 5055.
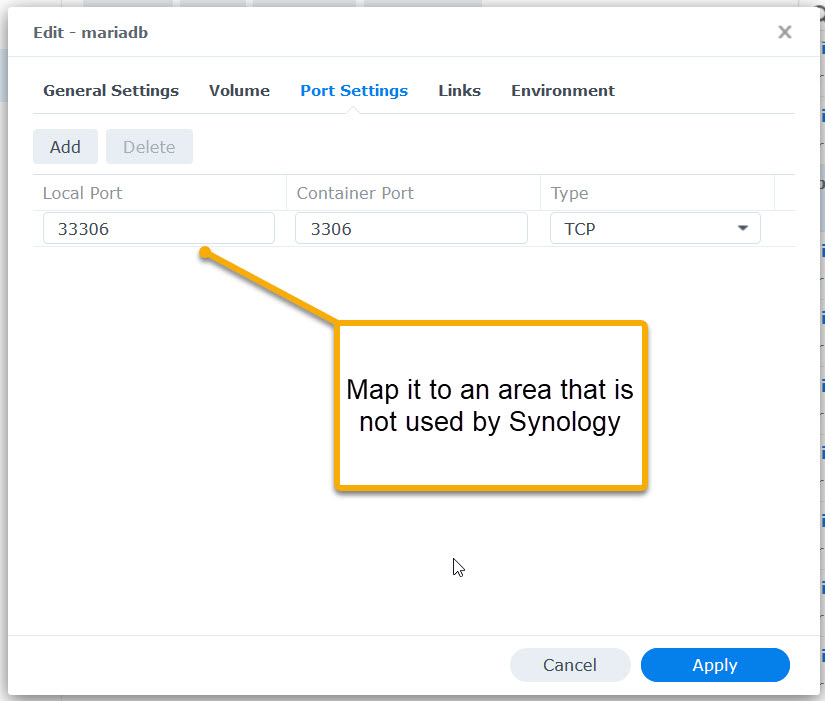
Why is this essential to know now? Synology is using the same range of ports – so we can’t use them and we need to map them to a different area. I choose to map 5055 to 55055.
My example:
Container configuration parameter:
- Launch traccar/traccar:alpine
- name: traccar
- click Advanced Settings
- Advanced Settings tab: Skip.
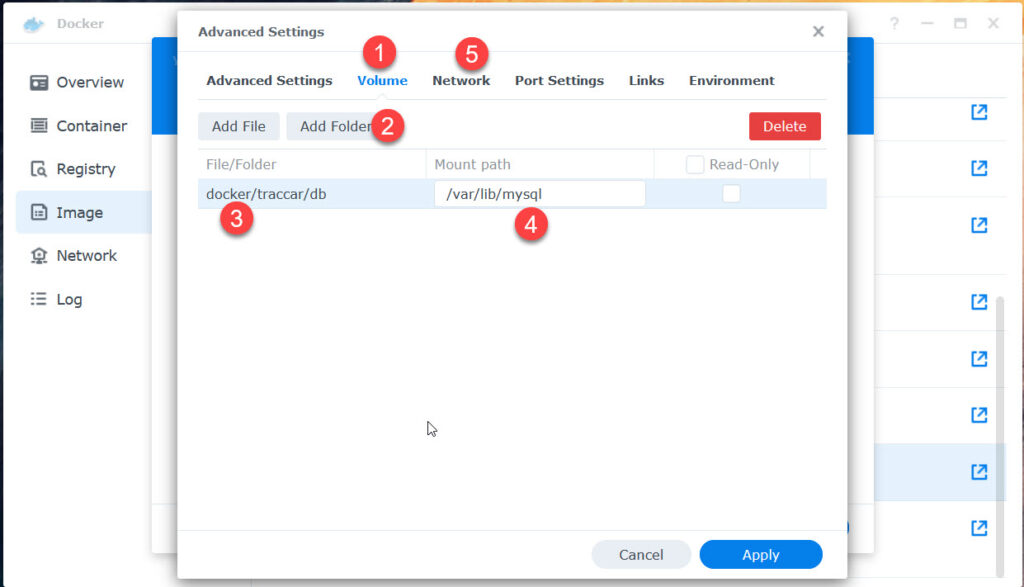
- Volume tab: Add Folder:
docker/traccar/traccar/logs – /opt/traccar/logs
docker/traccar/traccar/conf – /opt/traccar/conf - Network tab: Add to Traccar_Net, delete from bridge
- Port settings tab: Add following:
- The standard port to access the webinterface is 8082. You can (not must) map it to somewhere else. I’m using
Local port 8284 Container port 8082 - Now add ports for the tracker. Don’t forget to map them twice: TCP and UDP. Example:
55055 – 5055 – TCP
55055 – 5055 – UDP
- The standard port to access the webinterface is 8082. You can (not must) map it to somewhere else. I’m using
- Links Tab: Skip
- Environment tab: Skip
Ramping up
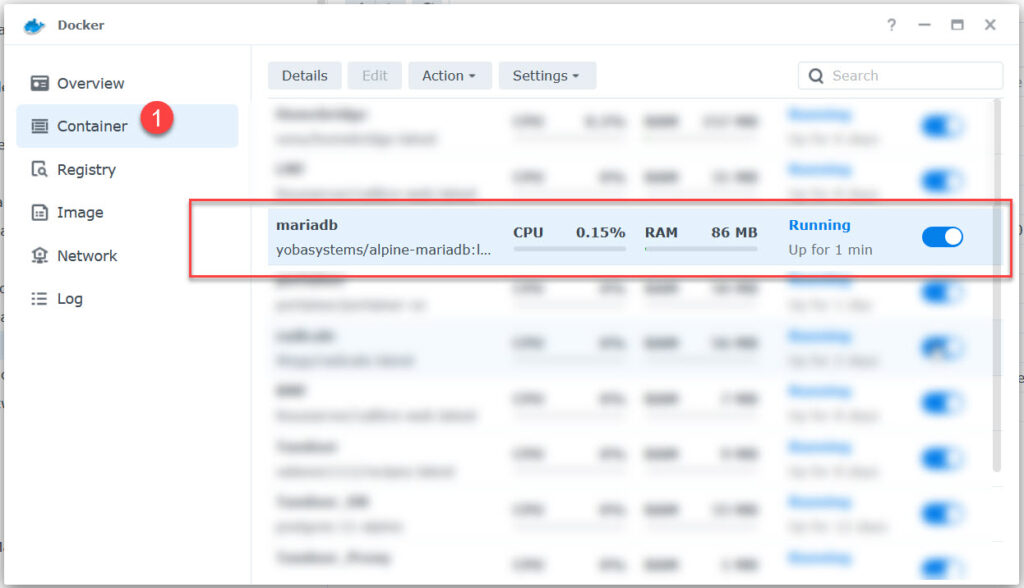
Starting the container
In Docker Container you can now start:
- mariadb
- In case you need to manage your data: phpmyadmin
- traccar
Login
As soon as the container is running, you can log in using your webbrowser: http://localhost:8082 where localhost is your Synology’s internal IP.
In my case: http://192.168.178.70:8082
Using a tracker
There is a variety of trackers that are supported by traccar https://www.traccar.org/devices/
I’m using an Inkutex TK5000 and the Traccar Client on my mobile.
See the port numbers per device / protocol.
Make sure the devices port don’t overlap to any of your Synology’s service ports!
Router & Reverse Proxy
- Router: Do port forwarding according to the tracker you will use. If you use the mobile app Traccar Client, then forward port 5055 TCP and UDP (always TCP and UDP).
- If you want to use the mobile app „Traccar Manager“ or you want to access your traccar server from abroad, you need to setup a Reverse proxy.
Go to Synology „Control Panel“ -> „Login Portal“ -> „Advanced“ -> „Reverse Proxy“
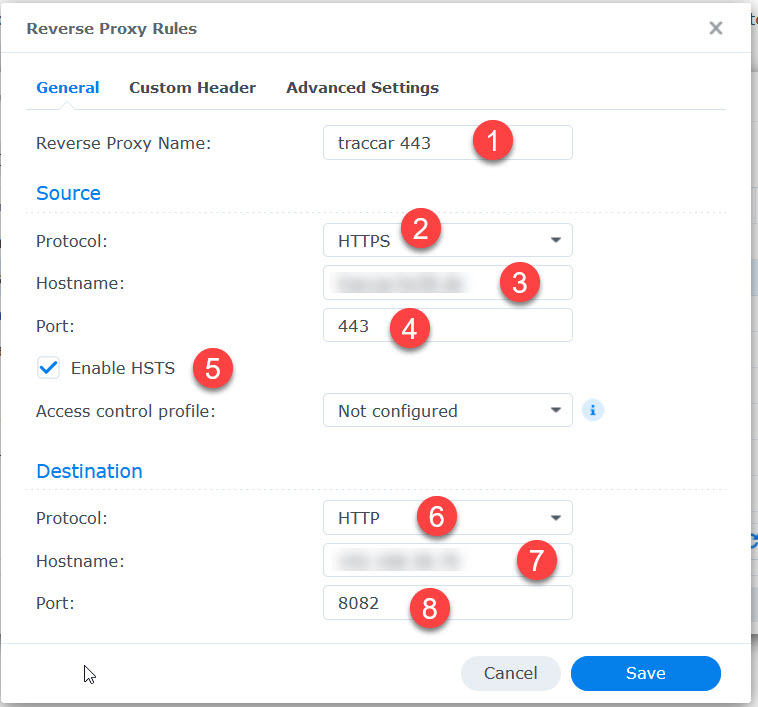
- Provide name
- Select https
- provide your Synology’s DynDns address or better an own for traccar
- select 433 for https
- Enable HSTS to route http to https
- traccar operates on http
- Synology’s local IP
- Traccars Webserver port 8082